Rendering Constraints

Once we had finished all the filming, editing and all the shots were placed together which satisied us and the audience we edited them furthur with full colour grading and synchronisation in the last final stages. One we were fully happy with our work the final thing do is is to render the whole music video onto one file format.

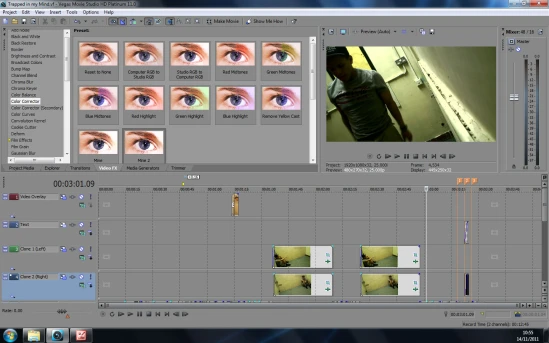
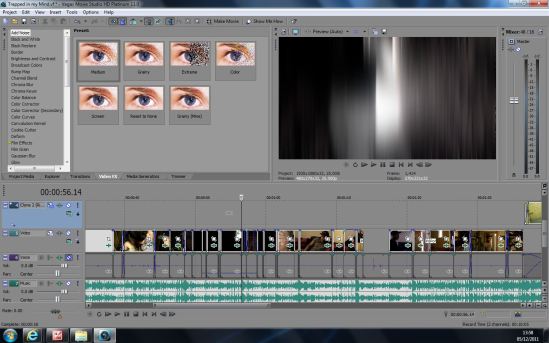
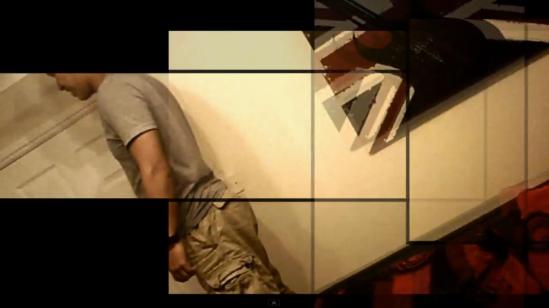
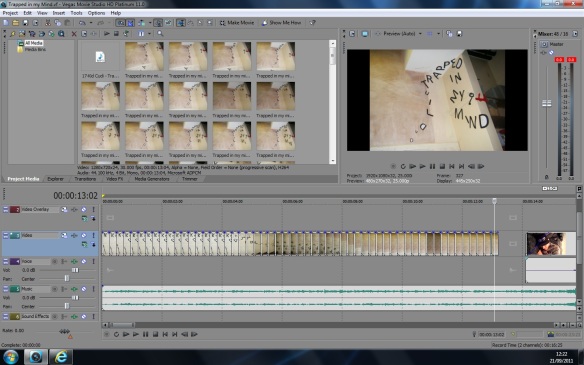
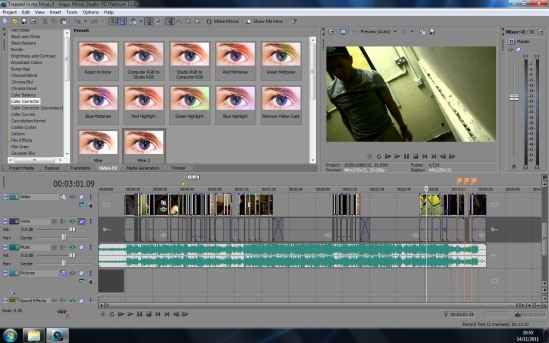
Below is a print screen of the final product. It clearly shows all the editing has been put in place and you can see how we have used a wide range of layering to achieve the complex techniques by overlaying some of the shots together for a smooth finish.

Problems and restrictions with rendering

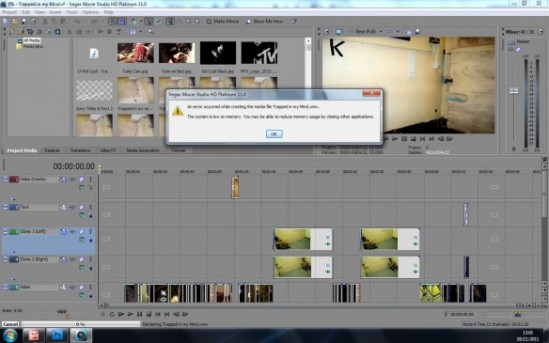
Whilst we started to render our media product we have problems with the computers. The computers we user weren’t powerful enough to allow us to render the video in the highest setting/HD. Therefore we hade to set the computer in safemode to only utilise one programme at once. This worked as it just gave us enough processing power to render it but not in HD but the second highest setting. However before we put it onto safe mode, we made sure we tested the rendering on several differnt computers and tested different file types. unfortunately they all failed at an extremely low percentage. This was when we knew we needed to take furthur action.

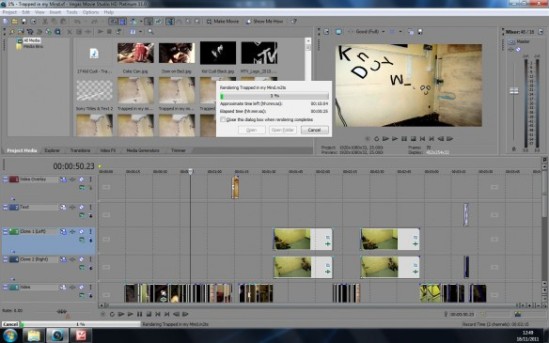
Below is a screen shot of what it says when the computer is rendering our music video along with the full rendering process.

Rendering Music Video on Safe mode.

Overall I think the rendering process was successful as we had managed to process our music video is a good enough quality that still produced a clear image. If we were to re-do this process the other option to take into consideration, was to simplify our editing techniques. However to me this wasn’t an option to me as I personally feel that our editing techniques and transistions are what makes our music video more surreal and interesting. If we had to take these factors away from our product it would have been very dissapointing. Therefore I feel extremely luckly that we were allowed to render our media product on safe mode.

Editing Part Four… (Final touches)

After we filmed the final scene, Modey and I sat down together and placed them onto Sony Vegas, our preferred editing suite. We cut them correctly and placed them into the spaces that we needed whilst syncing them to the music. This gave us a clear idea of what scenes are needed and where in the timeline.

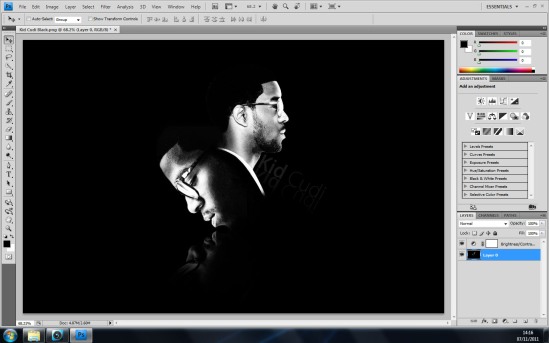
We also created a Kid Cudi poster to add into our music video where the title of the song and artist will suddenly appear. We created the image on Adobe Photoshop by adjusting the colours to match our video more which meant using dull but contrasting colours.

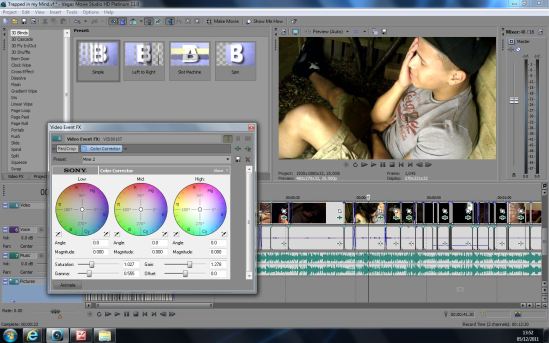
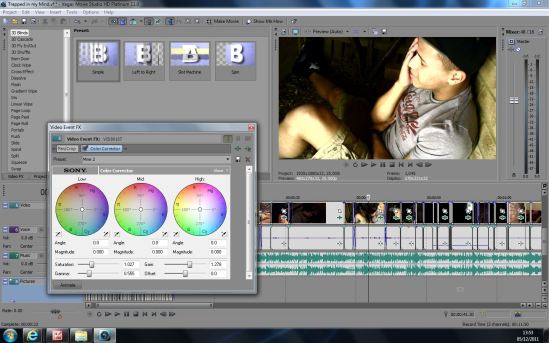
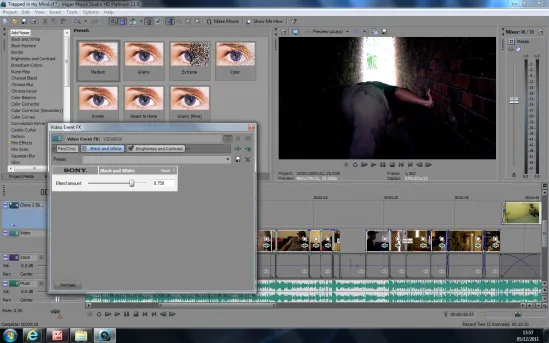
Once we had managed to place the shots we had taken in place with the song timeline we got onto the Video FX stage in Sony. Video FX is basically a tool that helps us adjust the tone and colour of our music video shots. There were 5 adjustments that we both loved and wanted to use it in our music video.  These adjustments are the following:

  • Colour Corrector
  • Black and White
  • Brightness
  • Contrast
  • Gaussian Blur
Colour corrector before
Colour corrector after
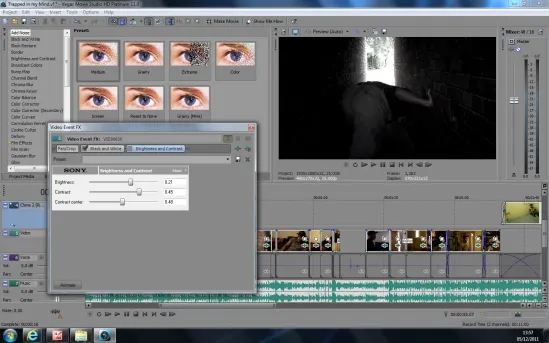
Before (Black and white,Blur,Brightness,Contrast)
Black and White
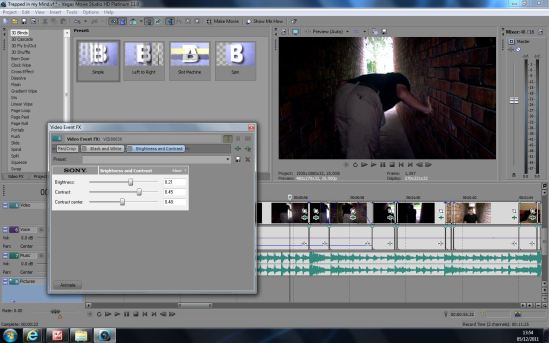
Brightness and Contrast
Gaussian Blur

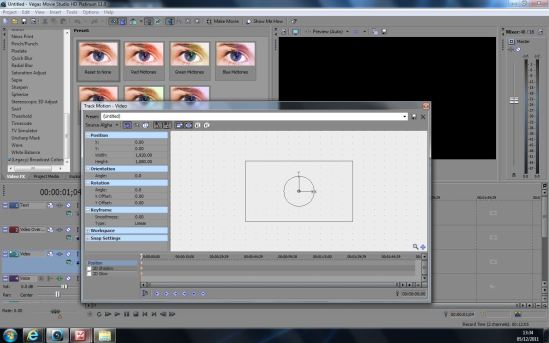
For the introduction of our music video we wanted to use still motion that were tightly together in a very small time frame. The main problem with the photo that I took was that some photos weren’t wide screen which was really annoying, therefore we decided that we could create a new layer in Sony Vegas timeline and placed the pictures onto that. Then we went onto track motion setting and disabled all of the locks that prevented me from moving around the screen. Once the images were locked it gave us the ability to stretch the narrow images and scaled them to fit the wide-screen setting which came out exactly what we wanted.

Scale

The Gaussian Blur is the adjustment I used to create the blurs that match the song in the introduction of the song, the alleyway scene and the ending of the song. The blur makes the video match the beat and tempo of the song, creating a better link between the two. An example of the Gaussian Blur before and After is located above in picture form.

The Gaussian Blur is a technique that we like to create blurs that matched the timing of the song for the introduction. This made our introduction much more interesting and complete. We also used a text from in the introduction with the name of the artist and song title after after the words appeared in the introduction, repeating what was read in the still shots.

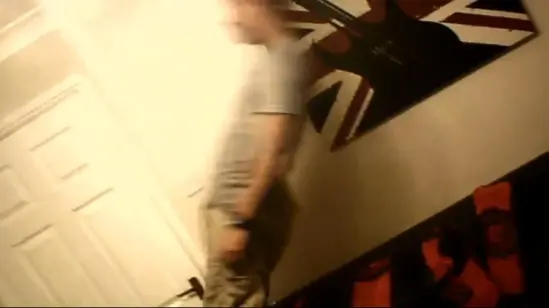
We used Slow-motion in 2 areas of our music video, one where Dom falls backwards onto the sofa which we thought would look really effective in slow motion. The other slow-motion technique in our music video is where Dom shows his anger and frustration towards the end of the music video, which was really effective to do in slow motion as it really emphasis his emotions within his face and body language.

Slow motion

Transitions in my music video link the shots, most of the transitions I used are:

  • Fade
  • Dissolve
  • Portals
  • Plain Cut

The most unique transitions are dissolve and portals. Dissolve is straight forward where two shots overlap and one dissolves whilst the other enters.

The portal transition was a good transition that created squares that makes the next shot appear. I really liked this transition and wanted to use it when there was a change of location in the music video, for example the choruses. This proved to be quite effective than other transitions or effects like the fades or wipes etc. As this transition looks much more technical, professional and made more people wanting to watch our progress as they were fascinated by our creativity of editing effects.

Portal Transition

Filming Part Five…

After observing the editing shots along with the lyrics sheet we knew exactly what type of shots are needed and how much filming space we still have available to fill in the gaps.

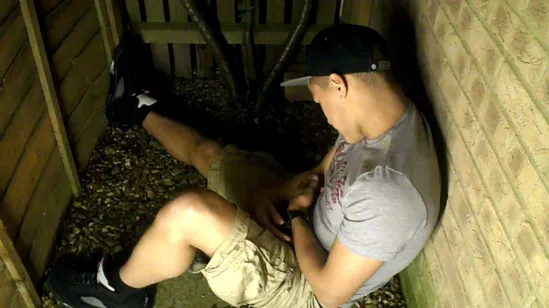
When choosing our final filming destination we decided to use eye as it was the most convenient location for all of us to get too, in a short period of time. In Eye we all met up and began to film the missing scenes within our music video. After searching around Eye Village we found a tight space between 2 walls and thought it would be a good idea to use our portable lighting at night to help us film this dark tight areas, which also allows us to use correct lighting. We filmed this scene extremely quickly due to us already having experience and knowledge of how to film each scene quickly and efficiently. Therefore for our last filming day we make sure the filming process will be much more organised that we have previously experienced. Not only did it help us increase confidence with the resources surrounding us, the actors also was confident with the scenes we require due to our organisational skills and expectations.

Above is a photo that we had taken to show the confined small space that we thought we would be a great place to film. The lighting of the shot is also very clear.

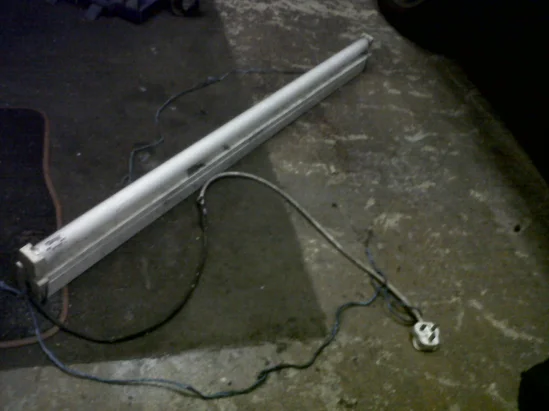
This is the light that we used to help us film this scene , we used an extension lead to plug it into a socket.

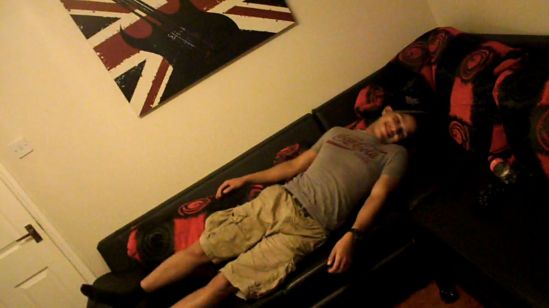
For another scene that we were filming in, we used Modey’s bed room, in this scene is demonstrates Dom waking up and singing the lyrics on a different sofa the he will gradually fall backwards in slow motion. This was quite a difficult shot to film as Dom wasnt very confident about falling correctly, therefore we had to take several shots to achieve the perfect shot. We eventually managed to take the shot as Dom’s confidence increased after practicing how he needs to move his body. Before be required this minor stunt we checked if it was safe enough for him to fall directly backwards, due to hazardous reasons. The falling scene was something that was not planning in our story boarding process however due to our editing constraints, we needed to fill in gaps that were missing due to the lack of knowledge of timing of the song against the length of the shots.

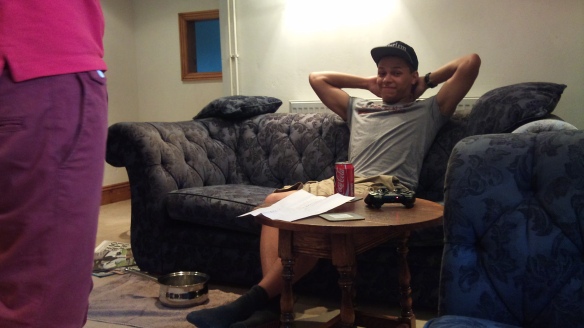
This is a shot of Dom’s laying in Modey’s sofa after his falling techniques.

I feel that we have successfully finished our filming scenes and if needed we shall return to re-film. However ever today was a short and simple sessions that was extremely productive, due to our increase of confidence and knowledge.

Second review of our work

We have decided to show a few people our music video to get some feedback so we could make any necessary improvements to our overall media product. By getting some feedback we can increase the standard of our work and achieve a better grade. Here are a variety of comments and feedback we received;

  • Really good start, it is strong and relates directly to the video and what you are trying to achieve
  • I really like the stop motions of the lettering at the beginning of the song, however it isn’t clear what the words spell after a few seconds. Therefore I would find a solution to make the words that you want the viewers to see stand out more.
  • The cloning of the main singer is amazing, however the contrast of that scene shows the secret behind the technique you have chosen to use. Make it more discreet if possible.
  • The narrative is a bit confusing at first, however the use of shots and angles within the video is very creative and original

Editing day three…

Editing the cloning shots:

From watching tutorials on you tube I learnt a lot about the simple steps that are needed to take place when wanting to create the cloning effect. We first needed to create a new layers for each scene then move them both to each side of the window. We then had to cut out the opposite side of the shot to allow them to blend in with each other. Then a problem occurred the lightening of both shots were slightly different in shades which create a line between the shots when they were moved together.

To get rid of that line down the middle, we used Video FX again so we can combine different forms of colour grading to the shots to help get rid of the line. This is done by changing the colour brightness and contrast which allows us to blend the shots in together, to give the impression its one whole shot. It took a lot of trial and error to find the perfect adjustment in the Video FX section to find the correct colour grading adjustments to suit the cloning shots. The brightness and contrast setting was the most useful tool to use as it did the job much better.

On the screen shot above, it clearly shows that the brightness and contract of the colour corrections have made a massive difference. The Video FX adjustments have proven to be extremely successful during this complex and hard process.

Editing day two….

Once we finished filming (Filming Day 2)  I got onto editing the scenes into Sony Vegas at school.

One of the hardest part of making a successful music video was making the lip syncing matching the song in harmony. If the lip syncing is bad it ruins the whole music video’s effect. Therefore it was essential for us to make sure Dom’s Lips matched correctly to the song, luckily we practiced lip syncing for our preliminary task to test if we had the ability to create a little music video test, working out the best way to lip sync. (to view our preliminary task click on this link) Lip syncing exercise 

Sneak Peak of Our Music Video ;)

Once had finished filming the alleyway scene we needed to make sure this could fit two parts of the song for example the chorus is normally repeated throughout music videos. We then cut this scene into parts and placed them along the timeline so it narrative makes sense.

Not much editing could take place apart from placing the scenes in the correct places and cutting them correctly to parts of the song. When all shots had been cut and placed in order, we did some further editing like colour correction practice, preparing ourselves for the later stages of the editing process.

Meeting the first deadline & review work

OUR FIRST DEADLINE FOR VIDEO….

End of September 30th is our first big deadline for our music video. The requirements were the following:

  • Begin to finish of doing most of the filming shots
  • Edit all the shots that we already have together
  • Show our media teacher the work we have produced so far, for feedback.
  • Once we got some feedback, we can then re-film shots that weren’t so successful and edit more in depth, so we are eligible to create a professional end result.
This is the little preview of the work that we have produced so far: Baring in mind there are still some scenes that aren’t completed yet and missing. This is the first scene of our music video, clearly demonstrating our big idea of the use of still shots and typography effects introducing the artist and title of the debut single:
This is the first scene of the still shots, they have a slight change of colouring throughout each still shot due to the lighting being different from different angles of the room. However, this will be solved once the music video had been fully completed and edited.
This is the last scene of our music video as we wanted to give a good ending to the song, by the use of complex editing skills. I really like this as the ending because it really shows that Kid Cudi (Dom Bennett) is getting really frustrated from not being able to escape from the room (known as the mind). After 24 hours of being trapped he gets angry adding emotions within the shots.
.
My overall opinion:
I am very pleased with what we have accomplished so far as a group in a space of a month. We have managed to research, plan and create a rough idea of what the end result could briefly look like. So far I think we have go a wide range of camera shots/movement that flows well together. We now know exactly what to do when it comes to finishing off the video and how to do it! This makes us more determined to get on with the job creating a successful music video that we are all proud off.

Filming Part Four….

Before we had decided to meet up again for the filming session on the 15th October we needed to make sure that we would not get kicked out of the school like before. Therefore to solve this problem we have spoken to Mr Zadi and asked him to create a letter for the site officers to open apartments that we need to film in and to be enabled to film within the school on a saturday without any problems getting in the way of the production process.

Once we had met up and began discussing our thoughts of what we could to for our next shots, Modey and I came up with a clever idea of creating a very unique shot that wasn’t been thought about yet to anyone in our media class. Therefore we wanted to show our originality and used a cloning technique. This shot includes having two or more of the same person all in one shot in one place, but each clone will interact with each other differently. To create this very unique shot we set up the camera and tripod in the correct place and cleaned the room up so it was empty with nothing else in the shot but the actor, also being in a clean and tidy location it would mean preventing the camera from moving. We then filmed Dom at one side of the room singing to one half of the song, then filmed again with Dom located on the other side of the room singing the second half of the song. But both lenghts of the shots would be playing at the same time and ending at the same time in harmony. This was a new way of combining a cloning technique in our post production to combine and merge two shots into one. Which appears that the same person is singing along with the song but is completely doing different actions, like they are different people singing a duet together.

Shot was added after filming and editing

One other shot that we thought we be a good idea to experiment with is where Dom is trapped and cannot escape from this empty dull room, therefore we wanted to show his struggle and frustration by telling him to hit the door and get really angry. This was shown by the high angle shot which makes him look vulnerable. We used boxes in the stock room to climb up to achieve the high angle show so we can film him coming into the room from a different angle. Modey suggested that we should place the camera really firmly against the wall so we can show that Dom is really trapped and that he needs to do that actions of confusion by his body language and facial expressions. The camera angle was chosen to remain the same during this scene as it gave us a wide shot of how small this room was when he is trapped, symbolizing a prison cell in some form.

When it came to the end of the music video we wanted to create a shot that would show fatigue and that Dom is getting to the point of giving up trying to escape. We directed Dom and told him that it would be a good idea to sit down in a way which shows that he is getting extremely depressed and upset, using vulnerable body language and shots to represent the mood of the actor. We asked him to tilt his head down and pretend to be upset to finalise the idea of him being trapped in this confusion.

Filming – Part Three…

On the 8th of October, we met up at 12.30pm and began to make our way to Glinton to do some filming. When arriving we successfully managed to get access into school to do the filming in the staff room where we would like to be located. After 30mins of setting up and filming a member of security had kicked the us out of our desired location, which caused massive amounts of time wasting and technical problems. The biggest problem that we are facing with our filming is that our main and only actor doesn’t attend Arthur Mellows Village College anymore; creating the dilemma of only having access of Dom in the weekends, when having part time jobs in the way. Arthur Mellows is not normally open during the weekends but luckily the school is currently getting newly refurbished in certain departments. Therefore we will need to get an approval agreement for the school to be open on the dates specified. We would also need a formal letter from our media teacher Mr Zadi, giving a written permission approval to use any area of the school. Unfortunately, when we arrived in school, we were forced to leave the property as no students are allowed to be located within in the school’s land during pupil closing times.

In conclustion not much filming could take place today, a lesson was to be learnt that no only do we need verbal permission but a formal permission letter with us at all times for our filming times and destination to be eligible. From this experience we shall be more organised and arrange a solid weekend when we can get the schools full permission and letter, allowing us to do some filming when Dom is fully available, preventing anymore problems occurring on our filming days.

Editing Day One… (Introduction)

On the 21st September we all began to edit the still shots to add movement in time with the music. The still shot also had to move in a special time which will make it easy for the audience to spot the artist and song title within the lettering. The benefit of placing each of the filming shots that we have produced so far, is so we can look careful at what shots are we dont want to use and the shots that were successful. Once all the desired shots are selected we began to put the shots in potential places of the song, so the lips syncing of Dom matched the song lyrics in harmony. Then with the blank spaces where there aren’t any shots in place, we listening to the song and looked careful at the editing and work out where the lyrics are needed. So we did a lyric analysis and compared the sheet of lyrics to the scene we have chosen. then when it comes to the next day of filming we can easily get Dom and will immediately know what part of the song he needs to sing and where it will be place. Not only will it help us and dom know when to sing, it will also indicate how long we need to re-film the shots and how long dom will need to lip sing for.

Editing Special After Effects….

Colour Correction / Grading:

Color grading or colour painting, is the process of altering and enhancing the color of a motion picture, video image, or still image either electronically, photo-chemically or digitally. The photo-chemical process is also referred to as color timing and is typically performed at a photographic laboratory. Modern color correction, whether for theatrical film, video distribution, or print is generally done digitally in a color suite. Considering such achievements in digital imaging, the artist has the ability to “paint” the image, thus the names “colorist” or “color painter” have become most applicable.”

“Color correction by using color gels, or filters, is a process used in stage lighting, photography, television, cinematography and other disciplines, the intention of which is to alter the overall color of the light; typically the light color is measured on a scale known as color temperature, as well as along a green–magenta axis orthogonal to the color temperature axis.”

Cloning / Layering:

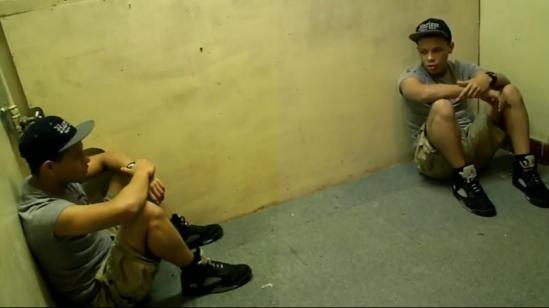
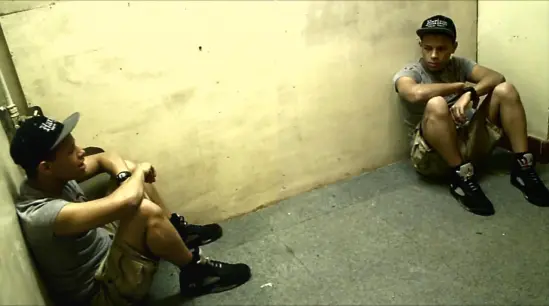
This is a prime example of the cloning/layering technique used in our music video. We kept the camera in the same position and just moved the actor around in the room, layering both shots on top of each other, creating them both in the same shot. However problem with this, there is a different in lighting of each corner of the room, creating a visible line down the center of the shot; showing where the layer has been placed.

Still Motion:

“Slow motion (commonly abbreviated as slowmo) is an effect in film-making whereby time appears to be slowed down. It was invented by the Austrian priest August Musger.

Typically this style is achieved when each film frame is captured at a rate much faster than it will be played back. When replayed at normal speed, time appears to be moving more slowly. The technical term for slow motion is overcranking which refers to the concept of cranking a handcranked camera at a faster rate than normal (i.e. faster than 24 frames per second). Slow motion can also be achieved by playing normally recorded footage at a slower speed. This technique is more often applied to video subjected to instant replay, than to film. High-speed photography is a more sophisticated technique that uses specialized equipment to record fast phenomena, usually for scientific applications.

Slow motion is ubiquitous in modern filmmaking. It is used by a diverse range of directors to achieve diverse effects. Some classic subjects of slow motion include:

  • Athletic activities of all kinds, to demonstrate skill and style.
  • To recapture a key moment in an athletic game, typically shown as a replay.
  • Natural phenomena, such as a drop of water hitting a glass “
Here is an example of some shots which have been transformed into slow motion, as it gives a more detailed view of what is happening:

Fading / Dissolve:

“In the post-production process of film editing and video editing, a dissolve is a gradual transition from one image to another. The terms fade-outand fade-in and are used to describe a transition to and from a blank image. This is in contrast to a cut where there is no such transition. A dissolve effectively overlaps two clips for the duration of the effect. The lengths of the two scenes can be adjusted by trimming, which, if desired, can change the original durations of the scenes before the dissolve was added.”

Here is an example founded on ‘YouTube’ on the different types of dissolving techniques available and their technical terms:

Editing software

To create my filming into a finished piece, I will be going to use “Sony Vegas”.

Sony Vegas Pro 10

What is Sony Vegas?

“Sony Vegas is a professional video editing software package for non-linear editing systems (NLE) originally published by Sonic Foundry, now owned and run by Sony Creative Software. Originally developed as an audio editor, it eventually developed into an NLE for video and audio from version 2.0. Vegas features real-time multitrack video and audio editing on unlimited tracks, resolution-independent video sequencing, complex effects and compositing tools, 24-bit/192 kHz audio support, VST and DirectX plug-in effect support, and Dolby Digital surround sound mixing. It runs on Microsoft Windows XP (XP x64 not supported) , Vista and 7. In April 2007, Sony along with AMD jointly demonstrated a 64-bit version of Vegas running on 64-bit Vista.”

From my previous experience with Song Vegas over the last year, I have developed a greater understanding of how to navigate and function Vegas pro 10 and strongly believe its the most professional software to use, which will allow us to be more creative with the movements, effects and transitions. It has also been really useful for our AS A Level project which gave us the ability to product a good quality piece of work in high definition (HD). Therefore this is the reason why we shall be going to use the updated version of Sony Vegas as this will be best suited for our media product.

The other editing software’s out there are harder to gain reach or were too simple/basic, minimizing the chance to show our creativity and ideas.  As the more simple and easy software’s to use aren’t as functionally complex as we required.


Filming Day Two…

On the 4th September 10:30am we all decided to meet up in Glinton to prepare of filming, as it was the only day where everyone was off work and free to do some work. We first had some problems with the choice of actor as Joey Yeboah was meant to be the main actor, staring the role of Kid Cudi, then we asked a few other people who had potential to replace Joey due to him being slightly un-reliable, as he is working within a different group. Therefore I kindly suggested to Modey to ask his mate Dom Bennett who was a previous media student at AMVC in 2009. Luckily Dom agreed to take the role of Kid Cudi and met us all up in Glinton. Around 11:00am we all check if the equipment was fully charged and all props were accessible if needed. We all walked down to school to check if it would be open on a Sunday! Which it wasn’t, however this didn’t stop us from filming as we went to the local shop in Glinton to buy some Coco-cola as we knew we would need to use this at some point of the day.

Then we walked to Pekirk as this was one of our chosen locations, decided in our location report. We eventually found the alleyway which we wanted to film in. We successfully got permission to film in between the houses if we weren’t going to disturb anyone. After 15 mins later we created approximately 12 shots of Dom Bennett walking down the alleyway towards the bright light. This look extremely effective and exactly how I imagined it, as he looks really dark like a tall shadow walking towards the light. We also wanted to experiment with the use of shots, as we wasn’t sure how long we had Dom Bennett for and the lighting would change if we didn’t get it done in time, as i was really fond of the lighting, creating a glowing, dull type of natural lighting.

After all the filming in Pekirk was finished we walked back to Sam’s house to do the filming in the room and the shot where we advertise the coca-cola bottle in an unique way, by experimenting with the camera movement. We felt that using a flip camera would be the easiest technology to use when filming this complex shot that took a lot of time to get “near to perfect”. The type of camera movements that we were aiming for today was very difficult as the tri-pod didn’t come into use as the shots we needed to create could only be done by hand held. This did give us a lot of pressure as we didn’t want to make the camera look shaky when it comes to the editorial stages of the construction and production.

As we suddenly needed to use Dom Bennett as our main actor there was a lot of pressure on him to get the lip syncing perfect. I knew this was going to be a massive problem to whoever our actor was going to be, due to the song being extremely unknown. However, we strongly felt like we needed a song that wasn’t going to be compared to an official video by the same artist. Therefore we put Dom into the deep end and asked him to learn the lyrics to the shot we needed from him. To help it out a bit we played the song in the back ground so he can get the lips in the correct time and place, to make the video appear more natural. This was very hard and time consuming. Lip syncing was made really easy in our preliminary as we had a natural born singer who knew the lyrics of the Jazon Maraz song by heart. So filming today became very stressful and frustrating, however we still motivated Dom with the singing and produced some good effective shots.

Overall I felt that today was successful and we have managed to produce some really good camera angles and shots. Domic was a very good actor when he gained confidence with the whole surreal environment and unique shots, and the lighting was at our advantage today as the weather was raining and dull just how we wanted it to be. More dull and surreal when he is trapped and brighter colours and shots when he is in the ‘real world’.

Filming – Day One…

On the 21st of July on the last day of school, myself and my group have decided to meet up to begin the first scene when the random scattered letters are developing into words. Modey and I met up in school at 8.30am to finish of the editing of the target audience interview 2. Whilst modey was finishing of the editing for the interviews and rendering it, I was printing out ‘KiD CuDi’ Letters in different text sizes and cutting them out individually. Overall we ended up with 50 letters of the Kid Cudi and Trapped in my mind all in different sizes from 700 to 300pt. Sam arrived at 10.45 to help us begin with the filming as we needed him if we were going to use more than one camera, plus to test the experiments we would need more than 2 pair of hands.

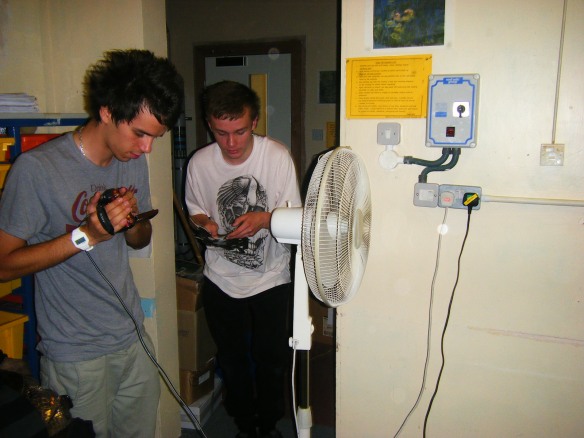
This is an image that I’ve take from the boys setting up out room into a working environment for our filming to begin. We managed to set up a fan in the corner of the room out of the way where we are going to be based. We thought we would need the fan as our original plan was to cut our different size letters that can be blown slowly by the fan with the letters landing into a set of words, which will introduce the artist and title of the song.

However our plan didn’t exactly work, as the letters blew extremely fast all over the place only giving us one split second to catch the flying letters in shot. Before my camera was able to take a picture the letters had already it the bottom of the floor therefore this idea failed to meet our expectations and we needed to find a different solution but keeping the same concept.

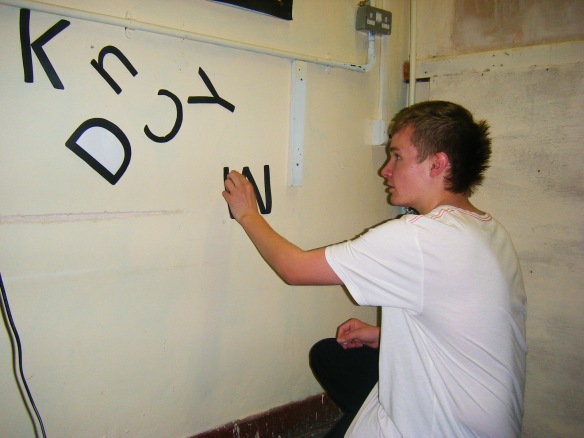
Instead of having the letters flying all over the room creating the sentences, we came up with the idea to stick each letter on individuality one by one on the wall in a random order, then gradually building up a sentence that is hidden on the wall. We have used a camera on a tripod, and a film on a tripod which gave us two different angles that gave us the ability to find the best angle for the shot we needed. Therefore Modey and I were behind the tripods and cameras taking shots of each letter that is applied to the wall. Whilst Sam was arranging the letters on the wall and moving out of the way before the shots were taken. This was a very quick and effective way of create some stop motion effects for our little introduction of our music video.

Difficulties & Constraints  We had some difficulties during this process as my camera ran out of battery which I didn’t think would be a massive problem as I had my charger with me, plus a spare camera with a full battery in place. I changed the camera whilst attempting to keep the tripod in the exact same place. When I has successful managed to change the camera to the fully charged on, the angle has slightly moved making it extremely hard to get back into its original form. Modey had tried to help get it back to the same angle which was near to impossible! Another problem occurred when I realised that my spare camera had a different flash option of the lighting of some still shots where slightly darker than it was, on my original camera. I didn’t think this would be too much of a problem as we can Photoshop it to change the brightness and contrast. Luckily we still had the shots that Modey was taken on his camera which was more fluent with the lettering however the camera quality was extremely poor and the angle at the beginning was unclear. This left us with a decision to work out how to solve this problem. The options we had was to Photoshop the images on Modey’s camera to make them more clear and stick with the dodge angle at the beginning, merge our shots together and see what happens, or use the shots that I’ve taken with a more professional camera and see if the change of angle can be solved in the editing stages.

Overall, I think day one has been very successful and productive as we have developed new skills.  Even thought we had made some mistakes during this filming process we managed to overcome these problems as a team! We have successfully filmed the first shot of our story board in just a few hours, and now know exactly what to do if we were going to re-take these shots to improve them.