Colour Scheme Considerations

When it comes to choosing a specific colour scheme, there are so many different shades and tones to experienment with. However, do we ever stop to think of people see when they are colour blind? Designers dont consider what the populations see’s, as long as it looks professional to viewers with normal eye sight. I would like to demonstrate what people see when it comes to choosing a certain colour. I have found a specific website that shows people what colour blind people see everyday and the difference in colours, compare to exactly what we view.

This normal vision (85.5% of the population) will see this bright colour red.
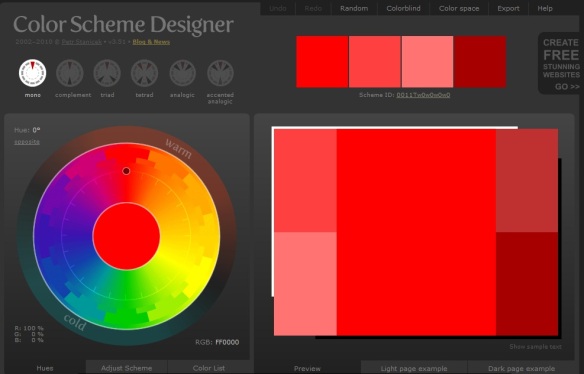
This is a drop down menu on http://colorschemedesigner.com/# where it lists all the types of colorblindness found, and the percentage of the population who has that specific blindness. This is extremely helpful, as not only will i be able to find out the types of colour blindness but the facts and percentages behind it, increasing my knowledge of how to design a successful product.
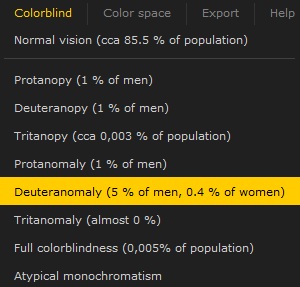
The types of colourblind are the following:

  • Protanopy (1% of men)
  • Deuteranopy (1% of men)
  • Tritaopy (0,003% of the population)
  • Protanomaly (1% of men)
  • Deuteranomaly (5% of men, 0.4% of woman)
  • Tritanomaly (almost 0%)
  • Full colorblindness (0,005% of population)
  • Atypical monochromatism
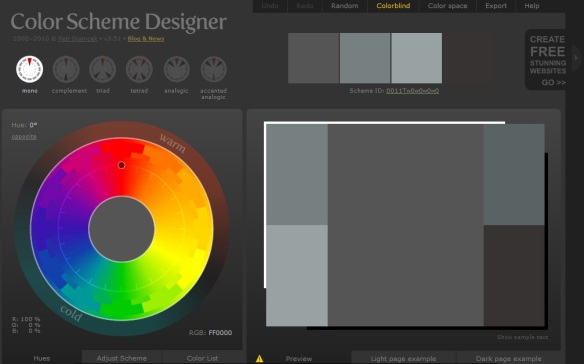
Full colourblindess (0.005% of the population) will see my chosen colour red as greys and browns. (prntScr below)

Looking at the reuslts from the bright vibrant red from a normal vision and comparing it to someone who is completely colour blind is shocking. I would have never thought that red could look anything like a dull colour grey. You would have thought orange or something similar would be the result. However from this investigation the different shades of greys and browns still contrasts well together, keeping the colour scheme consistent and therefore I will still keep the red colour scheme as from a colour blind vision, it still looks neat and professional.

Deuteranomaly (5% of men, 0.4% of woman) (PrntScr below)
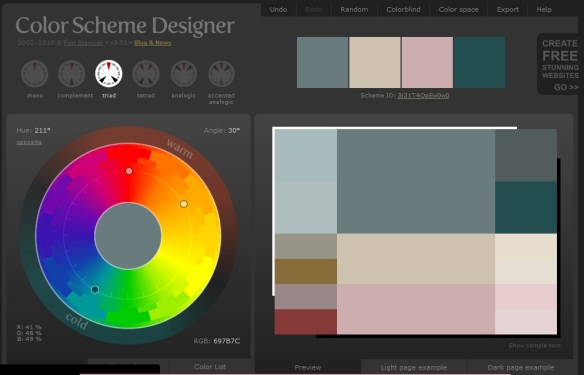
The result from the highest blindness came back interesting. The colour scheme is extremely random compared to the other results. I haven’t changed the hue or contrast of the red chosen in the previous examples. But amusingly the colour scheme appears to be combined using hints of reds and pinks whilst still seeing some sections in grey and green. Like people who have Deuteranomaly blindness are half colour blind but still see selections of colours but not clearly. From observing the combination of the colours in this chart, the colours do sit well together, not too hard on the eye, however could be confusing to some people. However the minor percentage of people who see this colour scheme will be greatly lower than people with normal vision, therefore after carefully considering other peoples visions, I have decided to sick with a professional clean colour scheme of reds, grays, blacks and whites throughout our ancillary task, as the colours chosen don’t affect a wide variety of people in a negative way.

Final Video Product….

This is the final fully completed music video.

Once we had fully completed our media product, Modey had uploaded our music video on to YouTube, whilst the video quality looks good on YouTube some of the lip syncing looks out of place for some reason. In the original this is not the case and the lip syncing matches the song, but on YouTube there is a slight delay.

Rendering Constraints

Once we had finished all the filming, editing and all the shots were placed together which satisied us and the audience we edited them furthur with full colour grading and synchronisation in the last final stages. One we were fully happy with our work the final thing do is is to render the whole music video onto one file format.

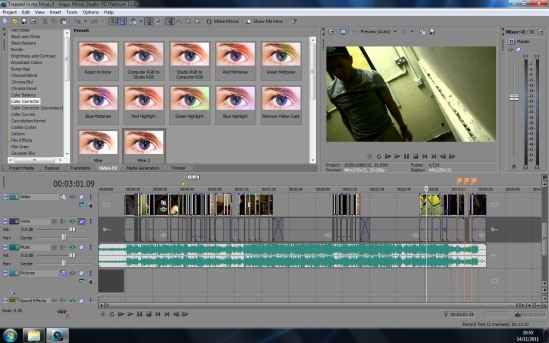
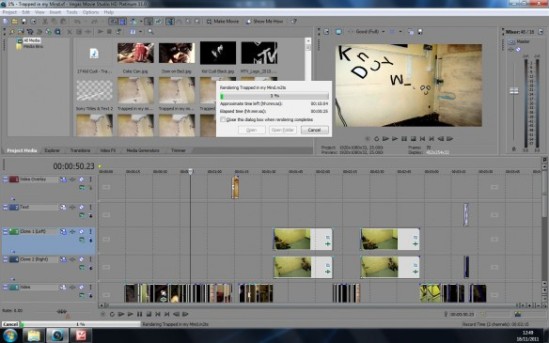
Below is a print screen of the final product. It clearly shows all the editing has been put in place and you can see how we have used a wide range of layering to achieve the complex techniques by overlaying some of the shots together for a smooth finish.

Problems and restrictions with rendering

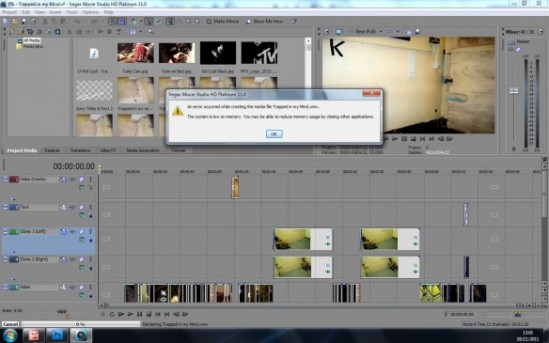
Whilst we started to render our media product we have problems with the computers. The computers we user weren’t powerful enough to allow us to render the video in the highest setting/HD. Therefore we hade to set the computer in safemode to only utilise one programme at once. This worked as it just gave us enough processing power to render it but not in HD but the second highest setting. However before we put it onto safe mode, we made sure we tested the rendering on several differnt computers and tested different file types. unfortunately they all failed at an extremely low percentage. This was when we knew we needed to take furthur action.

Below is a screen shot of what it says when the computer is rendering our music video along with the full rendering process.

Rendering Music Video on Safe mode.

Overall I think the rendering process was successful as we had managed to process our music video is a good enough quality that still produced a clear image. If we were to re-do this process the other option to take into consideration, was to simplify our editing techniques. However to me this wasn’t an option to me as I personally feel that our editing techniques and transistions are what makes our music video more surreal and interesting. If we had to take these factors away from our product it would have been very dissapointing. Therefore I feel extremely luckly that we were allowed to render our media product on safe mode.

Editing Part Four… (Final touches)

After we filmed the final scene, Modey and I sat down together and placed them onto Sony Vegas, our preferred editing suite. We cut them correctly and placed them into the spaces that we needed whilst syncing them to the music. This gave us a clear idea of what scenes are needed and where in the timeline.

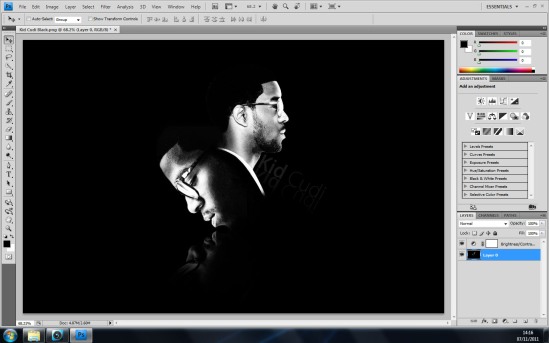
We also created a Kid Cudi poster to add into our music video where the title of the song and artist will suddenly appear. We created the image on Adobe Photoshop by adjusting the colours to match our video more which meant using dull but contrasting colours.

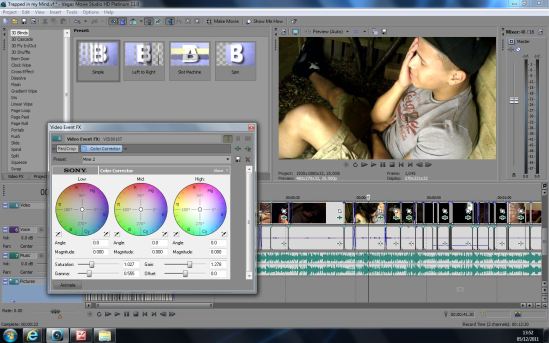
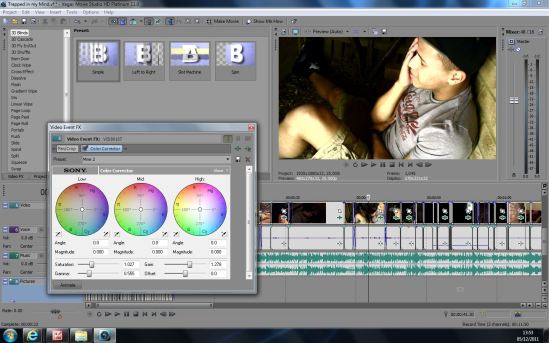
Once we had managed to place the shots we had taken in place with the song timeline we got onto the Video FX stage in Sony. Video FX is basically a tool that helps us adjust the tone and colour of our music video shots. There were 5 adjustments that we both loved and wanted to use it in our music video.  These adjustments are the following:

  • Colour Corrector
  • Black and White
  • Brightness
  • Contrast
  • Gaussian Blur
Colour corrector before
Colour corrector after
Before (Black and white,Blur,Brightness,Contrast)
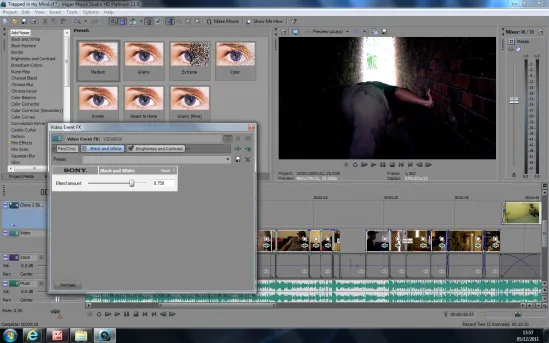
Black and White
Brightness and Contrast
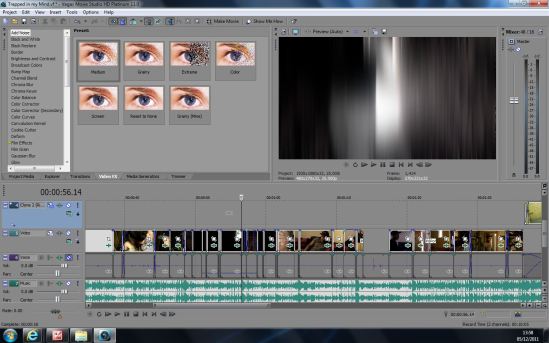
Gaussian Blur

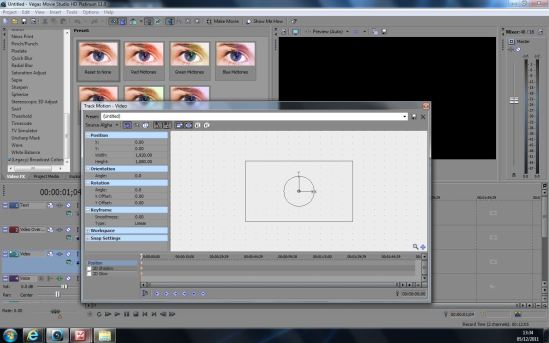
For the introduction of our music video we wanted to use still motion that were tightly together in a very small time frame. The main problem with the photo that I took was that some photos weren’t wide screen which was really annoying, therefore we decided that we could create a new layer in Sony Vegas timeline and placed the pictures onto that. Then we went onto track motion setting and disabled all of the locks that prevented me from moving around the screen. Once the images were locked it gave us the ability to stretch the narrow images and scaled them to fit the wide-screen setting which came out exactly what we wanted.

Scale

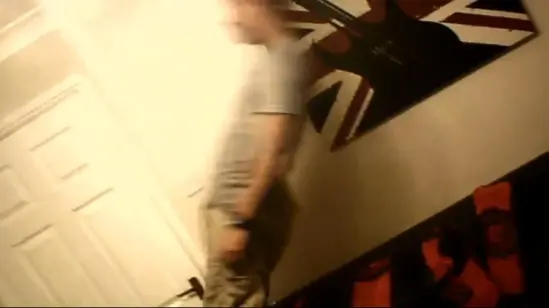
The Gaussian Blur is the adjustment I used to create the blurs that match the song in the introduction of the song, the alleyway scene and the ending of the song. The blur makes the video match the beat and tempo of the song, creating a better link between the two. An example of the Gaussian Blur before and After is located above in picture form.

The Gaussian Blur is a technique that we like to create blurs that matched the timing of the song for the introduction. This made our introduction much more interesting and complete. We also used a text from in the introduction with the name of the artist and song title after after the words appeared in the introduction, repeating what was read in the still shots.

We used Slow-motion in 2 areas of our music video, one where Dom falls backwards onto the sofa which we thought would look really effective in slow motion. The other slow-motion technique in our music video is where Dom shows his anger and frustration towards the end of the music video, which was really effective to do in slow motion as it really emphasis his emotions within his face and body language.

Slow motion

Transitions in my music video link the shots, most of the transitions I used are:

  • Fade
  • Dissolve
  • Portals
  • Plain Cut

The most unique transitions are dissolve and portals. Dissolve is straight forward where two shots overlap and one dissolves whilst the other enters.

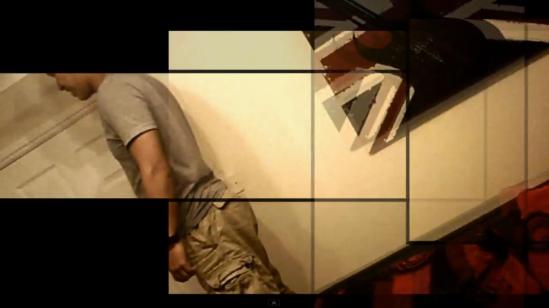
The portal transition was a good transition that created squares that makes the next shot appear. I really liked this transition and wanted to use it when there was a change of location in the music video, for example the choruses. This proved to be quite effective than other transitions or effects like the fades or wipes etc. As this transition looks much more technical, professional and made more people wanting to watch our progress as they were fascinated by our creativity of editing effects.

Portal Transition

Filming Part Five…

After observing the editing shots along with the lyrics sheet we knew exactly what type of shots are needed and how much filming space we still have available to fill in the gaps.

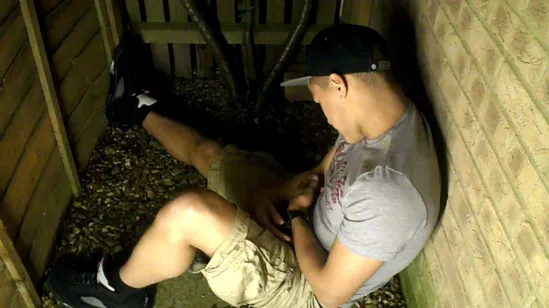
When choosing our final filming destination we decided to use eye as it was the most convenient location for all of us to get too, in a short period of time. In Eye we all met up and began to film the missing scenes within our music video. After searching around Eye Village we found a tight space between 2 walls and thought it would be a good idea to use our portable lighting at night to help us film this dark tight areas, which also allows us to use correct lighting. We filmed this scene extremely quickly due to us already having experience and knowledge of how to film each scene quickly and efficiently. Therefore for our last filming day we make sure the filming process will be much more organised that we have previously experienced. Not only did it help us increase confidence with the resources surrounding us, the actors also was confident with the scenes we require due to our organisational skills and expectations.

Above is a photo that we had taken to show the confined small space that we thought we would be a great place to film. The lighting of the shot is also very clear.

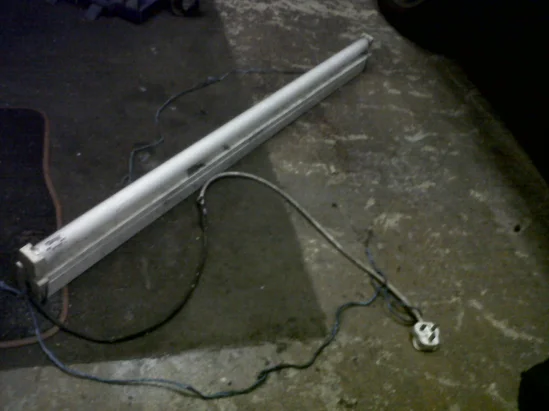
This is the light that we used to help us film this scene , we used an extension lead to plug it into a socket.

For another scene that we were filming in, we used Modey’s bed room, in this scene is demonstrates Dom waking up and singing the lyrics on a different sofa the he will gradually fall backwards in slow motion. This was quite a difficult shot to film as Dom wasnt very confident about falling correctly, therefore we had to take several shots to achieve the perfect shot. We eventually managed to take the shot as Dom’s confidence increased after practicing how he needs to move his body. Before be required this minor stunt we checked if it was safe enough for him to fall directly backwards, due to hazardous reasons. The falling scene was something that was not planning in our story boarding process however due to our editing constraints, we needed to fill in gaps that were missing due to the lack of knowledge of timing of the song against the length of the shots.

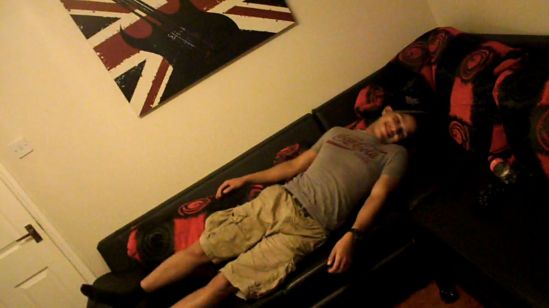
This is a shot of Dom’s laying in Modey’s sofa after his falling techniques.

I feel that we have successfully finished our filming scenes and if needed we shall return to re-film. However ever today was a short and simple sessions that was extremely productive, due to our increase of confidence and knowledge.

Second review of our work

We have decided to show a few people our music video to get some feedback so we could make any necessary improvements to our overall media product. By getting some feedback we can increase the standard of our work and achieve a better grade. Here are a variety of comments and feedback we received;

  • Really good start, it is strong and relates directly to the video and what you are trying to achieve
  • I really like the stop motions of the lettering at the beginning of the song, however it isn’t clear what the words spell after a few seconds. Therefore I would find a solution to make the words that you want the viewers to see stand out more.
  • The cloning of the main singer is amazing, however the contrast of that scene shows the secret behind the technique you have chosen to use. Make it more discreet if possible.
  • The narrative is a bit confusing at first, however the use of shots and angles within the video is very creative and original

Analyzing the editing progress

When we had thought we had nearly completed the music video, we realised when we were editing that some gaps were missing as we under estimated how long the shots were compared to the timing of the music. Therefore to make things much easier for us and more time efficient we began to analyze the editing progress comparing it to the lyrics sheet and found a way of working out where the missing shots are in comparison to the song sheet. By doing this we have successfully worked out what shots are needed to re-film so we can complete the music video for the deadline in time. Modey and I sat in the editing suite and listened to the song lyrics carefully. Looking back at our story board in the planning process we were eligible to figure out what scenes are needed and how long then should roughly last for. This makes it much easier for us to meet up again and tell Dom exactly what to do. In results when it comes to editing the final touches (Editing 4) the editing will be much easier to complete as we have the perfect length shots.

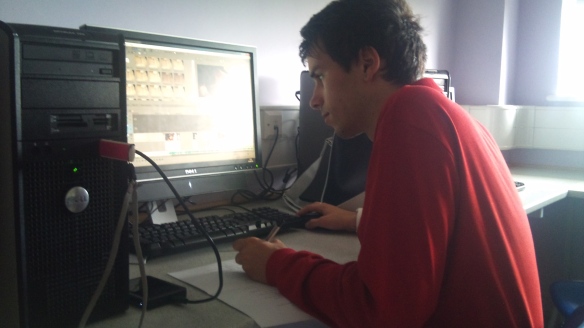
This is a photo that I took of modey on Sony Vegas watching our video and working out the estimate time that we need to complete unitl the music video is finished. He listened to the music and watch the shots and anaylsed the lyrics sheet, creating our lyrics sheet into a story board. So we all can read the song sheet and immediately imagine what shots needs to be repeated and how long for. I helped modey with this process and dicussed what shots we can use and where the next location should be held.

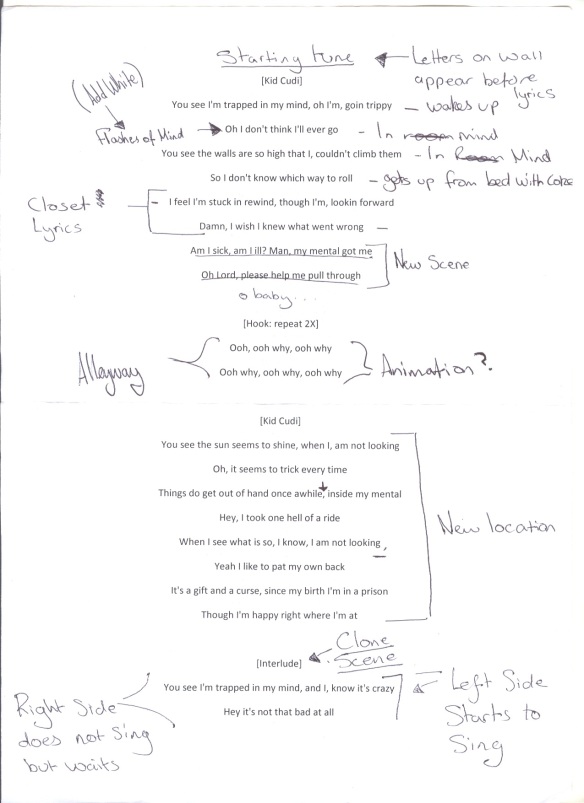
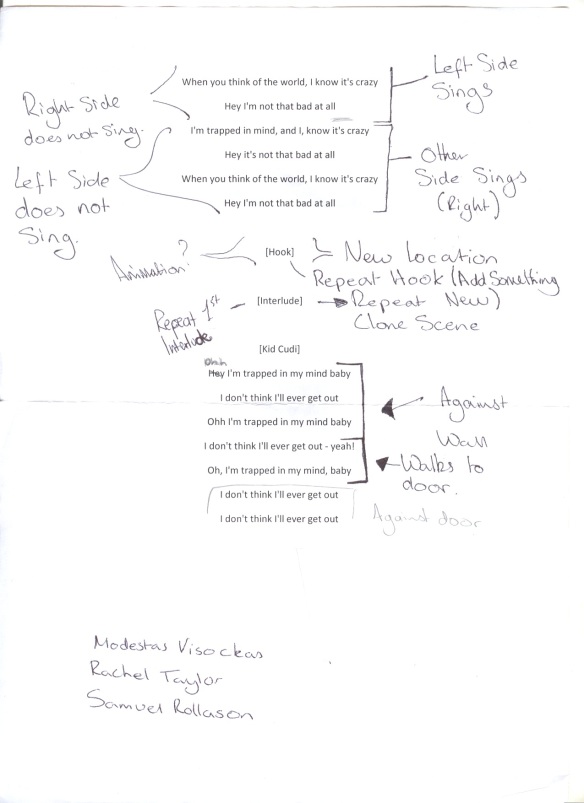
This is the first sheet of the lyrics that we analysed together. As you can see from this image we have highlighed exactly where any animation should be held and agreed that the chorus should have a new location which can be repreated.

As you can tell from this sheet, we decided to use the cloning effect towards the end of the song as we felt this would make an every interesting ending. We have also took our words of this lyrics sheet and made sure our narrative was inspired by the language used within this song. As we wanted the narrative and the music video to match which is called disjuncture and amplification as these are the two types of techniques that we used to generalise our overall music video.

Editing day three…

Editing the cloning shots:

From watching tutorials on you tube I learnt a lot about the simple steps that are needed to take place when wanting to create the cloning effect. We first needed to create a new layers for each scene then move them both to each side of the window. We then had to cut out the opposite side of the shot to allow them to blend in with each other. Then a problem occurred the lightening of both shots were slightly different in shades which create a line between the shots when they were moved together.

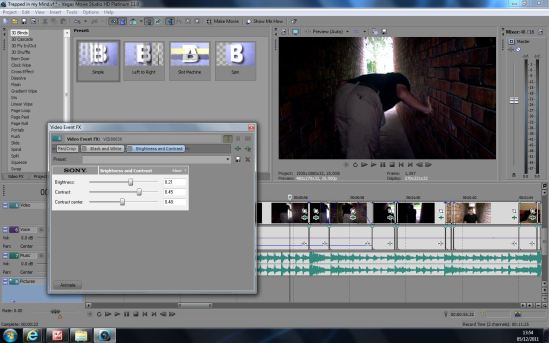
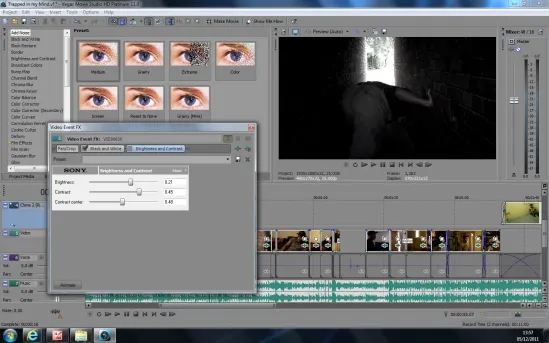
To get rid of that line down the middle, we used Video FX again so we can combine different forms of colour grading to the shots to help get rid of the line. This is done by changing the colour brightness and contrast which allows us to blend the shots in together, to give the impression its one whole shot. It took a lot of trial and error to find the perfect adjustment in the Video FX section to find the correct colour grading adjustments to suit the cloning shots. The brightness and contrast setting was the most useful tool to use as it did the job much better.

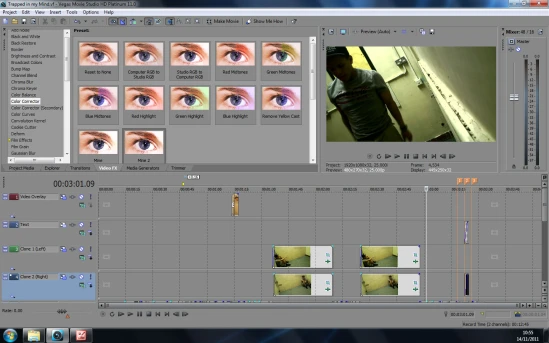
On the screen shot above, it clearly shows that the brightness and contract of the colour corrections have made a massive difference. The Video FX adjustments have proven to be extremely successful during this complex and hard process.

Editing day two….

Once we finished filming (Filming Day 2)  I got onto editing the scenes into Sony Vegas at school.

One of the hardest part of making a successful music video was making the lip syncing matching the song in harmony. If the lip syncing is bad it ruins the whole music video’s effect. Therefore it was essential for us to make sure Dom’s Lips matched correctly to the song, luckily we practiced lip syncing for our preliminary task to test if we had the ability to create a little music video test, working out the best way to lip sync. (to view our preliminary task click on this link) Lip syncing exercise 

Sneak Peak of Our Music Video ;)

Once had finished filming the alleyway scene we needed to make sure this could fit two parts of the song for example the chorus is normally repeated throughout music videos. We then cut this scene into parts and placed them along the timeline so it narrative makes sense.

Not much editing could take place apart from placing the scenes in the correct places and cutting them correctly to parts of the song. When all shots had been cut and placed in order, we did some further editing like colour correction practice, preparing ourselves for the later stages of the editing process.

Meeting the first deadline & review work

OUR FIRST DEADLINE FOR VIDEO….

End of September 30th is our first big deadline for our music video. The requirements were the following:

  • Begin to finish of doing most of the filming shots
  • Edit all the shots that we already have together
  • Show our media teacher the work we have produced so far, for feedback.
  • Once we got some feedback, we can then re-film shots that weren’t so successful and edit more in depth, so we are eligible to create a professional end result.
This is the little preview of the work that we have produced so far: Baring in mind there are still some scenes that aren’t completed yet and missing. This is the first scene of our music video, clearly demonstrating our big idea of the use of still shots and typography effects introducing the artist and title of the debut single:
This is the first scene of the still shots, they have a slight change of colouring throughout each still shot due to the lighting being different from different angles of the room. However, this will be solved once the music video had been fully completed and edited.
This is the last scene of our music video as we wanted to give a good ending to the song, by the use of complex editing skills. I really like this as the ending because it really shows that Kid Cudi (Dom Bennett) is getting really frustrated from not being able to escape from the room (known as the mind). After 24 hours of being trapped he gets angry adding emotions within the shots.
.
My overall opinion:
I am very pleased with what we have accomplished so far as a group in a space of a month. We have managed to research, plan and create a rough idea of what the end result could briefly look like. So far I think we have go a wide range of camera shots/movement that flows well together. We now know exactly what to do when it comes to finishing off the video and how to do it! This makes us more determined to get on with the job creating a successful music video that we are all proud off.

Filming Part Four….

Before we had decided to meet up again for the filming session on the 15th October we needed to make sure that we would not get kicked out of the school like before. Therefore to solve this problem we have spoken to Mr Zadi and asked him to create a letter for the site officers to open apartments that we need to film in and to be enabled to film within the school on a saturday without any problems getting in the way of the production process.

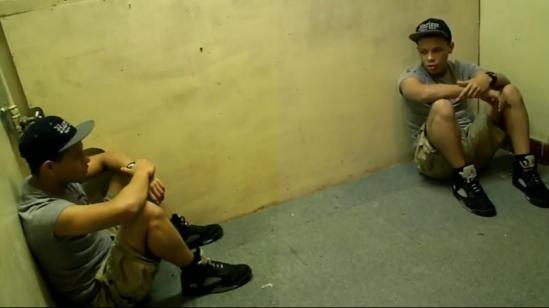
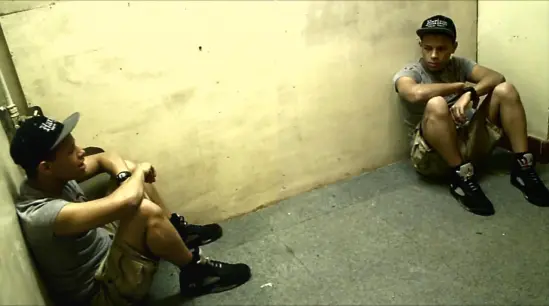
Once we had met up and began discussing our thoughts of what we could to for our next shots, Modey and I came up with a clever idea of creating a very unique shot that wasn’t been thought about yet to anyone in our media class. Therefore we wanted to show our originality and used a cloning technique. This shot includes having two or more of the same person all in one shot in one place, but each clone will interact with each other differently. To create this very unique shot we set up the camera and tripod in the correct place and cleaned the room up so it was empty with nothing else in the shot but the actor, also being in a clean and tidy location it would mean preventing the camera from moving. We then filmed Dom at one side of the room singing to one half of the song, then filmed again with Dom located on the other side of the room singing the second half of the song. But both lenghts of the shots would be playing at the same time and ending at the same time in harmony. This was a new way of combining a cloning technique in our post production to combine and merge two shots into one. Which appears that the same person is singing along with the song but is completely doing different actions, like they are different people singing a duet together.

Shot was added after filming and editing

One other shot that we thought we be a good idea to experiment with is where Dom is trapped and cannot escape from this empty dull room, therefore we wanted to show his struggle and frustration by telling him to hit the door and get really angry. This was shown by the high angle shot which makes him look vulnerable. We used boxes in the stock room to climb up to achieve the high angle show so we can film him coming into the room from a different angle. Modey suggested that we should place the camera really firmly against the wall so we can show that Dom is really trapped and that he needs to do that actions of confusion by his body language and facial expressions. The camera angle was chosen to remain the same during this scene as it gave us a wide shot of how small this room was when he is trapped, symbolizing a prison cell in some form.

When it came to the end of the music video we wanted to create a shot that would show fatigue and that Dom is getting to the point of giving up trying to escape. We directed Dom and told him that it would be a good idea to sit down in a way which shows that he is getting extremely depressed and upset, using vulnerable body language and shots to represent the mood of the actor. We asked him to tilt his head down and pretend to be upset to finalise the idea of him being trapped in this confusion.

Filming – Part Three…

On the 8th of October, we met up at 12.30pm and began to make our way to Glinton to do some filming. When arriving we successfully managed to get access into school to do the filming in the staff room where we would like to be located. After 30mins of setting up and filming a member of security had kicked the us out of our desired location, which caused massive amounts of time wasting and technical problems. The biggest problem that we are facing with our filming is that our main and only actor doesn’t attend Arthur Mellows Village College anymore; creating the dilemma of only having access of Dom in the weekends, when having part time jobs in the way. Arthur Mellows is not normally open during the weekends but luckily the school is currently getting newly refurbished in certain departments. Therefore we will need to get an approval agreement for the school to be open on the dates specified. We would also need a formal letter from our media teacher Mr Zadi, giving a written permission approval to use any area of the school. Unfortunately, when we arrived in school, we were forced to leave the property as no students are allowed to be located within in the school’s land during pupil closing times.

In conclustion not much filming could take place today, a lesson was to be learnt that no only do we need verbal permission but a formal permission letter with us at all times for our filming times and destination to be eligible. From this experience we shall be more organised and arrange a solid weekend when we can get the schools full permission and letter, allowing us to do some filming when Dom is fully available, preventing anymore problems occurring on our filming days.